

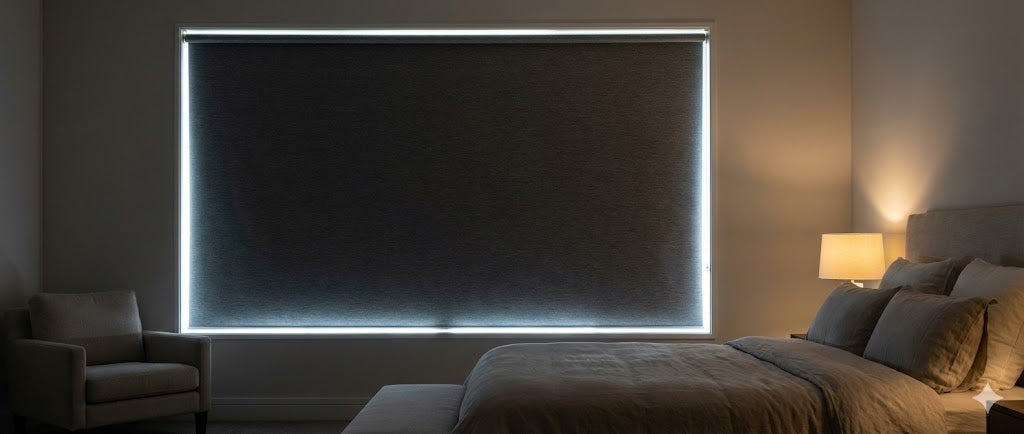
In my 15 years as a window treatment consultant, I've helped hundreds of homeowners solve the same frustrating problem: they love the organic texture and filtered light of their bamboo shades, but at night, those beautiful woven materials turn into a privacy nightmare. The "fishbowl effect" is real—when your interior lights are on and it's dark outside, every movement inside your home becomes visible to anyone walking by. This year, I'm seeing more clients than ever asking how to add blackout liner to bamboo shades without replacing their expensive window treatments entirely.
The good news? You don't need to spend $600 per window on custom blackout bamboo shades. With the right materials and technique, you can transform your existing shades for $30-80 per window. But here's what most DIY tutorials won't tell you: if you use the wrong adhesive or ignore the lifting mechanism, you'll end up with drooping liners, jammed cords, or worse—permanent damage to your shades.
Let me walk you through exactly how I approach this retrofit in my client projects, including the material science behind fabric selection and the mechanical adjustments needed for cordless systems.
- Why Bamboo Shades Need Liners
- Choosing the Right Fabric: Material Science
- The Adhesive Engineering Problem
- No-Sew Method: Professional Technique
- Sewing Method: The Durable Approach
- Removable Liner Systems for Renters
- Adjusting Cordless Spring Systems
- Cost Analysis & ROI
- Common Mistakes to Avoid
- Final Recommendations
Why Bamboo Shades Need Blackout Liners (The Physics Behind the Problem)
Bamboo shades are designed as light-filtering window treatments, not blackout solutions. The woven structure—whether it's bamboo, jute, reed, or grass—creates an "openness factor" with irregular gaps between the materials. During daytime, the high outdoor light intensity means your eye adapts to brightness, and the shade's surface reflection creates an illusion of privacy. But this optical balance reverses completely after sunset.
When I installed bamboo shades for a client in Portland last spring, she called me three days later saying she felt "like she was living in a storefront display." That's the fishbowl effect. The interior light projects through every gap in the weave, silhouetting everything inside. Beyond privacy concerns, there's also the issue of early morning sun—many of my Seattle clients with east-facing bedrooms can't sleep past 5:30 AM in summer because bamboo shades only reduce light by about 40-60%, not the 95-99% blockage needed for proper sleep darkness.
Adding a blackout liner solves both problems while preserving the natural aesthetic you paid for. But the retrofit changes the shade's weight distribution, which affects the lifting mechanism. I'll address that engineering challenge in detail later.
Choosing the Right Blackout Fabric: Material Science Matters
This is where most DIY projects fail. Not all blackout fabrics are created equal, and using the wrong material can lead to mold growth, glue failure, or mechanical problems.
Three-Pass Foam-Backed Fabric (Roc-Lon Type)
In my professional work, I specify Roc-Lon or equivalent three-pass blackout fabric for about 70% of bamboo shade liner projects. This material has three distinct layers: a decorative face fabric, a middle layer of dense black acrylic foam (the actual light blocker), and a white backing layer.
The white backing is critical for two reasons. First, it meets HOA requirements in most communities—I've worked in neighborhoods from Irvine to Charleston where exterior-facing window treatments must appear white or neutral from the street. Second, the white surface reflects solar heat rather than absorbing it, which reduces the greenhouse effect in the air cavity between your window glass and the shade. In my own home in Northern California, I measured a 12°F temperature difference on the shade fabric surface when comparing white-backed versus dark-backed liners during afternoon sun exposure.
The main drawback: foam-backed fabric is stiff. It doesn't drape naturally, which can create bulky folds when the shade is raised. For roman-style bamboo shades with multiple fold points, this stiffness sometimes creates a "lumpy" appearance when stacked. I typically reserve foam-backed liners for roller-style bamboo shades or simple flat panels.
Triple-Weave Polyester Fabric
For roman shades or any shade with a lifting cord system that requires tight folding, I prefer triple-weave blackout fabric. This material achieves light blockage through ultra-dense weaving rather than chemical coating—two layers of light-colored yarns sandwich a middle layer of black yarns, creating 90-95% light blockage (slightly less than foam-backed, but sufficient for most bedrooms).
The critical advantage is flexibility. Triple-weave fabric has natural drape similar to decorator fabric, so it follows the bamboo shade's curves and folds without fighting the structure. It's also machine-washable and won't crack or peel like degraded foam can after 5-7 years of heat exposure.
| Fabric Type | Light Blockage | Flexibility | Best Application |
|---|---|---|---|
| 3-Pass Foam-Backed | 99-100% | Stiff | Roller shades, flat panels |
| Triple-Weave Polyester | 90-95% | Excellent drape | Roman shades, corded systems |
| Canvas Drop Cloth | 60-70% | Poor | Not Recommended |
| Vinyl Shower Curtain | 95-99% | Good | Avoid (Risk of mold) |
Why You Should Never Use Shower Curtains or Cheap Drop Cloths
I've seen this mistake too many times. Someone thinks, "A vinyl shower curtain is waterproof and cheap—perfect blackout material!" Wrong. Vinyl and PEVA materials are non-breathable. In the micro-climate between your window glass and the bamboo shade, morning condensation has nowhere to evaporate. I've removed liner retrofits where the bamboo itself developed black mold spots within six months because a vinyl barrier trapped moisture against the natural fibers.
The Adhesive Engineering Problem (Why Regular Hot Glue Fails)
Here's something most online tutorials get dangerously wrong: they tell you to use whatever hot glue gun you have in your craft drawer. In my Phoenix and Tucson projects, I've removed dozens of failed liner retrofits where standard EVA (ethylene-vinyl acetate) hot glue melted during summer, causing the liner to sag, shift, or completely detach.
The air cavity between a south-facing window and the shade can reach 130-150°F on a summer afternoon. Standard craft hot glue has a softening point around 140°F. I've literally seen liners droop mid-season, creating wavy curtain effects or leaving visible glue stains where the adhesive bled through the bamboo weave.
Professional Adhesive Specifications
For permanent installations, I exclusively use high-temperature polyamide or acrylic-based hot glue, which maintains bond integrity up to 190°F. These adhesives cost $12-18 for a pack of 24 sticks (versus $4 for craft glue), but the thermal stability is non-negotiable for any window with direct sun exposure.
Alternatively, for projects where I want wash-ability or future removal options, I use high-quality fabric glue like Gorilla Clear Fabric Glue or Aleene's Fabric Fusion. These adhesives cure to a flexible, permanent bond that tolerates both heat and humidity. The trade-off: they require 24-48 hours of clamping or weighting, whereas hot glue provides instant tack.
Critical warning from the field: Never use construction adhesives like E6000 or Liquid Nails on fabric-to-bamboo applications. I've tried to salvage shades where someone used these products—the solvents in construction adhesives can weaken natural bamboo fibers, and the cured adhesive is so rigid it creates stress points that crack bamboo slats during raising and lowering cycles.
No-Sew Method: Step-by-Step Professional Technique
When I retrofit liners for clients who want a no-sew solution, I follow a specific protocol that addresses the two biggest failure modes: cord interference and weight imbalance.
Measuring and Cutting With Precision
Many people measure only the visible bamboo shade width and cut their liner to match. This is a mistake I see constantly. The liner must be 1-2 inches narrower than the shade's actual width—that means ½-1 inch clearance on each side.
Why? First, if the liner is flush with the shade edges, it becomes visible from the front when viewing at an angle, ruining the aesthetic. Second, and more critically, the side edges of the liner can catch on the window frame or mounting brackets during raising and lowering, causing the shade to jam or move unevenly.
For length, I cut the liner 2-3 inches longer than the shade's finished length. This extra material allows me to create a clean folded hem at the bottom, which prevents fraying and provides a neat edge to glue against the bottom rail.
The Critical Cord Avoidance Strategy
This is where 80% of DIY projects fail. Bamboo shades—especially roman-style shades—have a network of lift cords running vertically through guide rings sewn to the back. If you glue the liner over these cords, you've essentially taped them in place, making the shade impossible to raise.
Method 1 (Preferred for Roman Shades): I completely remove the lift cords from the shade before attaching the liner. This sounds intimidating, but it's actually straightforward. At the bottom of the shade, untie the knots securing the cord ends. Carefully pull the cords up through each guide ring, keeping them threaded through the top headrail pulleys. Now the bamboo shade is a flat surface with guide rings attached but no cords in the way.
Position the liner fabric against the back of the shade. Using a fabric marker, I mark the exact location of each guide ring on the liner. Then I cut small slits (about ½ inch) at each marked position. After gluing the liner in place, I use the tip of scissors or a curved upholstery needle to pull each guide ring through its corresponding slit in the liner. Finally, I rethread the lift cords through the guide rings—now the cords sit behind the liner (between the liner and the window glass), where they have full freedom of movement.
Method 2 (For Simple Roller or Non-Corded Shades): If the shade has no guide ring system, or if you're working with a cordless spring-loaded roller shade, the process is simpler. The liner simply adheres to the flat back surface. The key is applying adhesive only to the bamboo slats themselves, never to the decorative threading that connects the slats, as glue on thread will wick through and show on the front.
Adhesive Application Zones
I never apply adhesive in a continuous line or full coverage. Instead, I use what I call "zone bonding": small dots of adhesive every 6-8 inches along the vertical bamboo slats, focusing on three main areas:
- Top rail attachment: This is the primary load-bearing bond. I apply a continuous bead of high-temp hot glue along the entire width of the top rail (the horizontal wood bar at the top of the shade). This anchors the liner's weight.
- Vertical side strips: Along the leftmost and rightmost bamboo slats, I apply dots of adhesive every 6-8 inches. This prevents the liner from billowing away from the shade when windows are open.
- Strategic mid-points: In the center vertical area (avoiding any cord paths), I add a few anchor points to keep the liner flush against the shade.
The Ironing Guide Technique for Roman Shades
For roman shades with horizontal fold points, I use a technique I learned from a workroom fabricator in San Francisco. After marking the guide ring positions on the liner but before gluing, I iron horizontal creases into the liner fabric at each fold line. These pre-set memory folds train the liner to follow the shade's folding pattern. When I skip this step, the liner tends to bunch randomly or bulge outward when the shade is raised.
Sewing Method: The Most Durable Approach
In my higher-end projects, or when a client specifically wants maximum durability with zero adhesive risk, I sew the liner to the bamboo shade. This requires more skill and time, but the result is mechanically superior.
Tool Selection: The Curved Upholstery Needle
You cannot use a standard straight sewing needle for this. The bamboo slats are rigid, and trying to push a straight needle through creates awkward hand angles and risks stabbing yourself. I use a 3-4 inch curved upholstery needle, which allows me to pass the needle around bamboo slats and through the woven thread structure connecting the slats. For thread, I either use clear monofilament (fishing line weight 20-30 lb test) for invisibility, or heavy-duty polyester thread matched to the bamboo shade's color.
Stitch Pattern and Anchor Points
I don't sew continuously. Instead, I use a lock-stitch pattern at strategic points:
- Top rail: Whip-stitch the liner to the wooden headrail through pre-drilled pilot holes (1/16 inch diameter). I space these stitches every 4-6 inches across the width.
- Guide ring integration: This is the professional technique. I actually remove each guide ring from the bamboo shade (they're typically sewn on with a few stitches). Then I position the liner, and sew the guide ring back through both the liner and the bamboo shade simultaneously. This locks the liner into the shade's mechanical structure.
- Side edges: Every 6-8 inches vertically, I pass the needle around the edge bamboo slat (not through it) and through the liner, creating a figure-eight lock stitch.
Removable Liner Systems: Solutions for Renters
In about 20% of my consultations, the client is renting or wants seasonal flexibility—blackout in winter, but they want to remove the liner in summer to enjoy filtered light. For these scenarios, permanent adhesive or sewing doesn't work.
Industrial-Grade Velcro System
I use only outdoor-rated Velcro products like "Extreme Outdoor" or "Heavy Duty Stick-On" varieties. The standard sew-on Velcro you buy at craft stores has adhesive backing that fails in window heat within months. The hook-side (rough) Velcro adheres to the bamboo shade's top rail. The loop-side (soft) gets sewn to the liner's top edge. This creates a detachable bond strong enough to hold the liner's weight but allows removal for washing or seasonal storage.
The Independent Tension Rod Strategy
For rental situations where the landlord prohibits any modification to existing window treatments, I install a separate tension rod in the window frame cavity, behind the bamboo shade. A ready-made blackout curtain panel hangs on this rod. This requires that your window frame has sufficient depth—typically 2.5-3 inches minimum.
Mechanical Adjustments for Cordless Spring Systems
Adding a blackout liner increases a bamboo shade's weight by 30-60%, depending on fabric choice. If your shade uses a cordless spring-loaded roller mechanism, this weight increase will throw off the spring tension calibration. I've had clients call me saying their newly-lined shade won't stay up or slowly creeps downward over the course of hours.
Re-tensioning the Spring Motor
Cordless shades use a spiral torsion spring inside the roller tube. The spring is pre-wound at the factory to balance the shade's original weight. When you add liner weight, you must increase the spring's preload to compensate.
Here's my field procedure:
- Lower the shade to about half-way down its full travel.
- Remove the shade from its mounting brackets (usually a lift-and-tilt motion).
- While holding the shade fabric to prevent it from retracting, manually roll the shade fabric around the tube as tightly as possible. You're essentially winding additional tension into the spring.
- Reinstall the shade in the brackets while keeping it in this wound-up state.
- Test operation. If the shade now snaps up too aggressively, repeat the process but unwind one full rotation before reinstalling.
Cost Analysis and ROI Considerations
Let me give you real numbers from actual projects, because the cost difference between DIY liner retrofits and purchasing pre-made blackout bamboo shades is dramatic.
| Window Size | DIY Total (Materials + Labor) | New Custom Blackout Shade | Savings |
|---|---|---|---|
| 36" × 64" | $95 | $380 | $285 (75%) |
| 48" × 72" | $118 | $520 | $402 (77%) |
| 60" × 84" | $142 | $680 | $538 (79%) |
The price multiple is staggering—you're paying 4-8 times more for the convenience of a factory-made product. For a home with 8-10 windows needing blackout retrofits, the DIY approach saves $2,000-4,000.
Common Mistakes I've Fixed in Failed DIY Projects
In 15 years of consulting, I've been called to salvage dozens of botched liner retrofits. Here are the patterns I see repeatedly:
- Using Standard Hot Glue: A couple in Scottsdale hired me after their south-facing bedroom shade's liner literally slid down the bamboo like a melting candle in July. They'd used EVA craft glue sticks. We re-did it with acrylic hot glue, and two years later it's still perfect.
- Gluing Over Lift Cords: This is the most common catastrophic error. Someone follows a Pinterest tutorial that shows gluing the liner to the back of the shade without addressing the cord system. Within days the cords bind or snap.
- Choosing Overly Heavy Materials: A client in Boston used canvas duck cloth (14 oz) because it was cheap. The shade's cordless spring mechanism couldn't lift the weight. I replaced it with 6 oz triple-weave blackout fabric, and the spring operated normally.
Final Recommendations Based on Your Situation
After walking through the complete technical landscape, here's how I advise clients to proceed based on their specific circumstances:
- If you have simple cordless roller bamboo shades with direct sun exposure: Use white-backed three-pass foam liner (Roc-Lon type) with high-temperature acrylic hot glue. Expect to re-tension the spring mechanism. Budget 90 minutes per shade, $40-50 in materials per window.
- If you have roman-style bamboo shades with lift cord systems: Use triple-weave blackout fabric with the cord-removal and re-threading technique. Either sew or use fabric glue (not hot glue on this application due to the flexibility needed at fold points). Budget 2-3 hours per shade for your first attempt, $50-65 in materials.
- If you're renting or want seasonal flexibility: Install a tension rod system with separate blackout curtain panels behind the bamboo shade. No modification to the existing shade. Budget 15 minutes per window, $25-40 total cost per window.
- If you're in an HOA-controlled community: Regardless of method, only use white-backed liner fabrics to ensure exterior compliance.
In my professional practice, I've seen that homeowners who take time to understand the mechanical and material science principles behind this retrofit achieve results indistinguishable from factory installations. The key is respecting the engineering constraints—don't overload the lift mechanism, use temperature-appropriate adhesives, and work with rather than against the shade's cord system.

Leave a comment
This site is protected by hCaptcha and the hCaptcha Privacy Policy and Terms of Service apply.