


In my 15 years of working with homeowners and commercial clients, I've seen blackout roller shades evolve from basic light-blocking fabric to sophisticated systems that manage heat, privacy, and energy costs. This year, the market has shifted dramatically—not just in aesthetics (natural textures and earth tones are everywhere in 2025), but in safety regulations and smart home compatibility. If you're researching blackout roller shades, you're likely weighing fabric types, installation methods, and whether motorization is worth the investment. This guide breaks down the technical details, common mistakes, and professional insights I've gathered from hundreds of installations.
- What Makes a Shade "Blackout"
- Fabric Composition: Fiberglass vs. Polyester
- Backing Color & Heat Physics
- Installation Methods: Inside vs. Outside
- Cordless vs. Motorized Systems
- Matter Protocol vs. Proprietary Systems
- Measuring and Ordering Guide
- Maintenance and Failure Modes
- Cost Breakdown & Tiers
- Final Recommendations
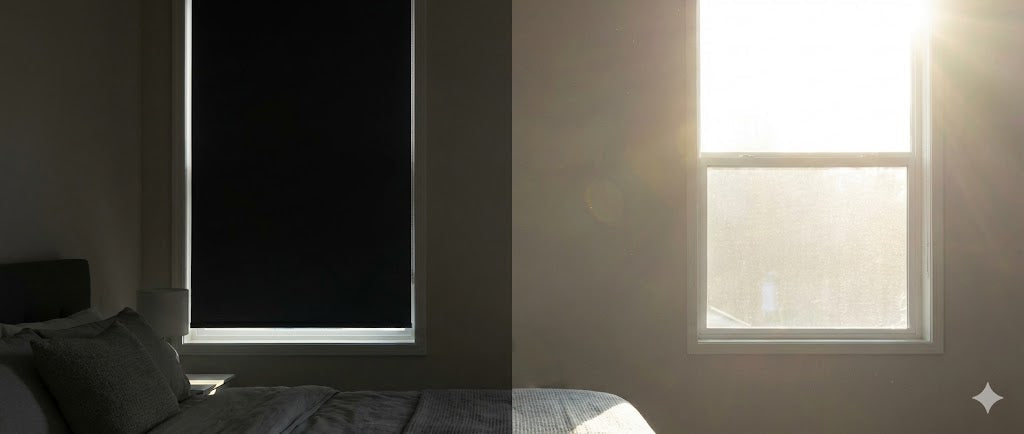
What Makes a Shade "Blackout"
The terminology matters more than most retailers explain. A true blackout roller shade achieves 0% light transmittance (Tv = 0%) through the fabric itself. This requires either a dense foam-backed coating or a multi-layer laminate with an opaque black core—often made with carbon black particles embedded between PVC films. Room darkening shades, by contrast, block 95-99% of light. Under direct sunlight, you'll notice a faint glow or halo effect around the edges, which can be enough to disrupt sleep in south-facing bedrooms or ruin the picture quality in a home theater.
Here's what I tell clients: if you're sensitive to light (shift workers, migraines, or young children), don't compromise with "room darkening." The 1-5% difference is perceptible. For reference, I worked with a Seattle family whose toddler couldn't nap past 7 AM during summer. We replaced 98% opacity shades with true blackout fabric, and the difference was immediate—the room stayed dark until 9 AM.
Fabric Composition: Fiberglass vs. Polyester
Most consumers don't realize that the base material under the coating determines whether your shades will stay flat or curl at the edges over time. The two dominant substrates are fiberglass and polyester, and their physical properties create trade-offs.
Fiberglass
Fiberglass-backed roller shades are common in hotels, offices, and high-end residential projects for good reason. The material has near-zero elongation under tension, meaning a 10-foot-wide shade won't sag or warp over months of daily use. I've installed fiberglass blackout shades in conference rooms with 12-foot-tall windows, and five years later, they still roll up perfectly flat.
The thermal stability is another advantage. Fiberglass doesn't expand or contract with temperature swings, so you won't see the wavy distortions that happen when cheaper fabrics heat up against a sunny window. Additionally, because fiberglass is inorganic, it's inherently flame-resistant. When paired with fire-retardant PVC coatings, these shades easily meet NFPA 701 and Class A fire ratings—mandatory for commercial buildings.
One downside: fiberglass is thicker than polyester at equivalent opacity levels, so the rolled-up shade takes more space in the cassette or headrail. If you're working with a shallow window recess (less than 2 inches deep), this can be a problem.
Polyester
Polyester (polyethylene terephthalate) is the default substrate for most residential roller shades because it's inexpensive and available in endless colors and textures. The problem is dimensional stability. Polyester has a higher elongation rate than fiberglass—around 15-30% before breaking—which sounds good for flexibility but translates to long-term sagging.
The more frustrating issue is what the industry calls "cupping" or "edge curling." I've seen this on probably 40% of mid-range polyester blackout shades after 18-24 months. The vertical edges of the fabric curl inward or outward, creating gaps that defeat the purpose of blackout material. This happens because polyester yarns have tension memory, and when combined with acrylic or PVC coatings that shrink at different rates, the fabric literally bends.
A client in Austin installed polyester blackout shades in her nursery, and within a year, the edges curled so badly that morning light leaked through the sides. We replaced them with fiberglass-backed shades, and the problem disappeared. If you're committed to polyester for budget reasons, look for 3-layer or 4-layer laminated constructions, which reduce curling by balancing tension across multiple planes.
Backing Color: White vs. Black
This is one of the most misunderstood specifications. The color of the side facing the window (the "backing") determines how much solar heat enters your room, regardless of the front-facing decorative color.
White Backing: The Cool Choice
White or light-colored backing reflects 70-80% of solar radiation back through the glass before it converts to heat. This is basic physics—high albedo surfaces bounce shortwave infrared energy outward. I always recommend white-backed blackout shades for west-facing or south-facing windows in warm climates. The fabric itself stays cooler (I've measured surface temps 15-20°F lower than black-backed equivalents), which reduces the load on your AC system.
In a Phoenix project, we installed white-backed blackout roller shades in a living room with floor-to-ceiling windows. The homeowner's energy bills dropped by roughly 18% during summer months compared to the previous year when they used dark curtains. The shades blocked 100% of visible light but reflected most of the thermal energy before it radiated inward.
Black Backing: The Heat Trap
Black backing absorbs 80-90% of solar energy, converting it to heat at the fabric surface. That heat then radiates into the room via long-wave infrared. Yes, you've blocked the light, but you've essentially installed a giant radiator on your window.
The secondary risk is thermal stress on the glass. If you mount a black-backed shade close to standard double-pane windows (especially low-E coated glass), the temperature differential between the inner and outer panes can cause spontaneous breakage. I've seen this twice—once in a Chicago condo where the interior pane shattered on a 95°F day. The glass reached an estimated 140°F while the outer pane stayed at 90°F, creating enough stress to exceed the material's tolerance.
If you must use black backing (for aesthetic reasons or because the room needs to stay cool and dark simultaneously), ensure there's at least 3-4 inches of airspace between the shade and the glass, and consider upgrading to tempered or heat-strengthened glazing.
Installation Methods: Inside Mount vs. Outside Mount
This is where many DIY projects fail. The mounting method determines whether you achieve true blackout or just "mostly dark."
Inside Mount
Inside mounting means the shade installs within the window recess, sitting flush with the wall. It's visually clean and doesn't block window trim, but it creates two unavoidable vertical gaps—one on each side.
Here's why: roller shade fabric must be narrower than the roller tube's bracket width to prevent the fabric from rubbing against the brackets during operation. On a standard clutch-operated shade, you'll lose approximately 15-20 mm on the control side (where the chain hangs) and 10-13 mm on the idle side (where the idle pin sits). These gaps act like laser beams of light in a dark room.
Many people measure only the window frame width and order shades to fit, then wonder why light pours in at the edges. I always add side channels or light-blocking strips when clients insist on inside mount for blackout applications. Side channels are U-shaped aluminum or plastic tracks that attach to the window frame sides—the fabric edges slide within the channels, physically blocking the light path. They add about $50-$100 per window but are mandatory for true blackout in inside-mount scenarios.
Outside Mount
Outside mounting places the shade on the wall or window casing above the recess. The fabric overlaps the window opening by 3-4 inches on all sides, eliminating side gaps through sheer coverage. This is the simplest and most cost-effective way to achieve blackout.
The trade-off is visual bulk—the shade headrail and fabric are visible on the wall, which some designers find disruptive. However, you can mitigate this by mounting the shade higher (closer to the ceiling) to create the illusion of taller windows. I often recommend outside mounting for bedrooms and home theaters where function outweighs aesthetics.
Pro tip: when measuring for outside mount, add 8-12 inches to the window width (4-6 inches per side) and mount the shade 4-6 inches above the window frame. This ensures complete light blockage and makes the window appear larger.
Cordless vs. Motorized Systems
If you're shopping for blackout roller shades in 2025, you need to know about the regulatory change that reshaped the industry. The ANSI/WCMA A100.1-2022 standard, which took effect in 2024, banned traditional continuous-loop bead chains and free-hanging pull cords on custom-ordered window coverings sold in the U.S. This was a child safety measure—corded window coverings caused dozens of strangulation deaths over the past two decades.
What This Means for Buyers
Manufacturers can no longer sell custom roller shades with long cords unless they include failsafe tensioning devices (which render the shade nearly inoperable if the tensioner isn't wall-mounted). This has pushed the market toward three options:
- Cordless spring-assisted systems: You manually push the shade up or pull it down, and an internal spring holds it in place. These work well for shades up to 6 feet wide and 7 feet tall, but larger sizes become difficult to operate smoothly.
- Motorized shades: Electric motors built into the roller tube. Battery-powered (wire-free) or hardwired (low-voltage). This used to be a luxury feature but is now cost-competitive with compliant manual systems.
- Short-loop chains: Bead chains or pull cords limited to 8 inches in length. These are awkward to use and only practical for small windows.
In my experience, motorization has become the default for blackout applications. The upfront cost difference between a compliant manual shade and a rechargeable motorized shade is often just $100-$150 per window, and the convenience factor is enormous—especially for hard-to-reach windows or when you want to schedule shades to lower at sunset.
Matter Protocol vs. Proprietary Systems
The smart shade market fragmented into proprietary ecosystems for years—Somfy RTS required a Somfy hub, Hunter Douglas PowerView required a PowerView hub, and so on. In 2025, that's changing due to the Matter protocol and Thread networking.
Matter + Thread: The Open Standard
Matter is a unified smart home protocol supported by Apple, Google, Amazon, and Samsung. Thread is the low-power mesh network that carries Matter commands. What this means practically: if you buy a Matter-compatible motorized blackout roller shade (like the Eve MotionBlinds), you can control it directly through your iPhone, Google Home, or Alexa without buying a separate bridge or creating yet another account.
I recently installed Eve MotionBlinds in a client's Boston condo. Setup took less than 5 minutes—scan a QR code with the Apple Home app, and the motor joins the Thread network created by their HomePod Mini. Commands execute locally (no cloud dependency), so the shades respond in under a second. They can trigger scenes like "Good Morning" (shades open, lights dim to 50%) or "Movie Time" (shades close, lights off).
The advantage over traditional RF systems is interoperability. If you later switch from Apple to Google or add an Amazon Echo, the shades still work—no need to replace motors or buy new hubs.
Battery Life and Hardwiring
Battery-powered motors (typically lithium-ion with USB-C charging) are ideal for retrofit projects where running new wiring isn't feasible. Modern motors last 6-12 months per charge with daily use. I recommend them for most residential applications.
Hardwired motors (12V or 24V DC) connect via low-voltage wiring (CAT6 or speaker wire). They're better for large shades (over 10 feet wide) that need more torque, and you never worry about charging. However, installation requires running wires through walls or along trim, which adds labor cost. I specify hardwired systems for new construction or major renovations where the walls are already open.
Measuring and Ordering
Incorrect measurements account for about 30% of the customer-service issues I've seen with online shade orders. Here's the professional approach:
Inside Mount Measurements
- Width: Measure the inside width of the window recess at three points (top, middle, bottom). Use the narrowest measurement. Do not add or subtract anything—report the exact recess width. The manufacturer will apply the necessary deductions (usually 1/4 inch total) to ensure the shade fits without rubbing.
- Height: Measure from the top of the recess to the sill at three points (left, center, right). Use the longest measurement to ensure full coverage.
- Depth check: Ensure the recess is at least 2 inches deep. Blackout shades with side channels may require 2.5-3 inches.
Outside Mount Measurements
- Width: Measure the window frame width, then add 8-12 inches (4-6 inches per side). This overlap blocks light gaps and makes the window appear larger.
- Height: Measure from your desired mounting height (typically 4-6 inches above the frame) to the bottom of the sill or floor. Add 2-3 inches below the sill for full coverage.
Many people forget to account for obstacles like window cranks, locks, or protruding trim. I always measure clearance on all four sides before finalizing dimensions.
| Mount Type | Width Calculation | Height Calculation | Light Gap Risk |
|---|---|---|---|
| Inside Mount | Exact recess width (no additions) | Exact recess height (longest point) | High (requires side channels) |
| Outside Mount | Frame width + 8-12 inches | Mounting point to sill + 2-3 inches | Low (overlap prevents gaps) |
Maintenance and Failure Modes
Blackout roller shades are durable, but specific failure patterns emerge over 3-5 years depending on material quality.
PVC Yellowing and Cracking
Low-quality PVC coatings degrade under UV exposure. The plasticizers migrate out of the polymer matrix, leaving the surface brittle. I've seen this on budget shades from big-box retailers—after two years, the white backing turns yellow-beige, and small cracks appear along the folds.
Solution: look for PVC-free alternatives like TPO (thermoplastic polyolefin) or 100% polyester with acrylic foam backing. These materials don't contain chlorine or phthalates, so they resist UV degradation better and emit no "new plastic" odor during the first week.
Edge Curling (Polyester Specific)
As mentioned earlier, polyester shades develop edge curl due to tension mismatch between the yarn and coating. This is irreversible once it starts.
Prevention: choose fiberglass-backed blackout fabric for any shade wider than 6 feet or in rooms with direct sun exposure. Fiberglass costs 20-30% more but eliminates this failure mode entirely.
Telescoping (Off-Center Rolling)
When a shade rolls up unevenly, creating a cone shape instead of a tight cylinder, it's called telescoping. This usually means the mounting brackets aren't level, or the fabric has slight weave distortion (warp or weft threads aren't perfectly perpendicular).
Fix: check bracket alignment with a laser level. If the brackets are level but telescoping persists, you can add thin adhesive strips (like electrical tape) to one end of the roller tube to artificially increase the diameter on that side. This forces the fabric to spool evenly. It's a shimming trick I learned from a commercial installer in New York.
Cleaning Without Damaging Coatings
- PVC-coated shades: These are nearly indestructible. Use a damp sponge with mild dish soap, wipe horizontally, and let air-dry before rolling up. You can even use a soft brush for textured surfaces. Never use ammonia or bleach—these degrade PVC over time.
- Polyester with acrylic backing: Much more delicate. Vacuum with a soft brush attachment every few months. For stains, blot (don't rub) with a barely damp microfiber cloth. Scrubbing will damage the foam layer and create visible marks.
Never submerge or machine-wash any roller shade. The adhesives between layers will delaminate.
Cost Breakdown
Blackout roller shades range from $30 per window (IKEA fixed-size stock shades) to $1,000+ per window (custom Lutron motorized with side channels). Here's how I advise clients on budget allocation:
Tier 1: Entry-Level ($30-$100 per window)
Examples: IKEA Tretur (manual), IKEA Fyrtur (motorized), Home Depot stock sizes.
Pros: Incredibly affordable. IKEA's Fyrtur uses Zigbee smart home integration (works with Amazon Echo Plus or Philips Hue Bridge). Good for rentals or temporary solutions.
Cons: Fixed sizes only—you can't customize width or height, so you're limited to standard window dimensions (23", 38", 48" widths). Polyester fabric will curl over time. Zigbee reliability is lower than Thread/Matter.
When to use: Guest bedrooms, rental properties, or any window where light control is nice-to-have but not critical.
Tier 2: Mid-Range Custom ($150-$400 per window)
Examples: SelectBlinds Premium Blackout, Blinds.com Signature Blackout, The Shade Store's standard line.
Pros: Fully customizable dimensions. Choice of fiberglass or polyester. Motorization available. These companies offer 30-50% sales frequently, making them cost-effective. Lifetime warranties on mechanics (usually excludes motors and fabric wear).
Cons: "Lifetime warranty" often means 5-7 years on motors and limited coverage on normal wear. Fabric quality varies—some use thin PVC that off-gasses heavily in the first week.
When to use: Primary bedrooms, kids' rooms, home offices. This is the sweet spot for most residential projects.
Tier 3: Premium ($500-$1,000+ per window)
Examples: Lutron Serena, Hunter Douglas PowerView, Eve MotionBlinds (Matter-enabled).
Pros: Whisper-quiet motors. Lutron's Intelligent Hembar Alignment ensures multiple shades raise and lower in perfect sync (critical for multi-window walls). Hunter Douglas offers exclusive fabrics and lifetime motor warranties (with registration). Eve MotionBlinds are the only major brand with native Matter support as of 2025.
Cons: Expensive. Proprietary ecosystems (except Eve). Repairs often require factory service.
When to use: Luxury homes, whole-home automation systems, or anywhere motor noise and perfect synchronization matter (e.g., home theaters, master suites with 8+ windows).
| Price Tier | Cost per Window | Customization | Fabric Base | Smart Home | Warranty |
|---|---|---|---|---|---|
| Entry-Level | $30-$100 | Fixed sizes only | Polyester | Zigbee (IKEA) | 1-2 years |
| Mid-Range | $150-$400 | Fully custom | Polyester or fiberglass | RF or Wi-Fi (hub required) | 5-7 years (motor), lifetime (mechanics) |
| Premium | $500-$1,000+ | Fully custom | Fiberglass | Matter (Eve), RF (Somfy/Hunter Douglas) | Lifetime (motor with registration) |
Case Studies
Case 1: Seattle North-Facing Nursery
Challenge: Parents needed blackout for a 6 AM sunrise during summer, but the room felt like a cave during the day.
Solution: Installed dual roller shades (blackout + 30% openness sheer on a single bracket). The sheer layer provided daytime privacy and glare control while preserving natural light. At naptime, they lowered the blackout layer.
Cost: $320 per window (SelectBlinds custom dual shades, manual cordless).
Outcome: Child slept until 8:30 AM. Parents could use the room during the day without artificial lighting.
Case 2: Phoenix West-Facing Living Room
Challenge: 12-foot-wide by 8-foot-tall floor-to-ceiling windows. Summer afternoon sun made the room unbearable (95°F+ at 4 PM).
Solution: Outside-mounted fiberglass blackout shades with white backing. Motorized (Somfy Wirefree) for ease of operation. Programmed to auto-lower at 2 PM when solar sensors detected high light levels.
Cost: $1,800 for three windows (high labor due to size and hardwiring for solar sensors).
Outcome: Room temperature dropped to 78°F at 4 PM. AC runtime reduced by an estimated 18%.
Case 3: Brooklyn Home Theater
Challenge: Client wanted zero light leakage for a projector setup but had shallow window recesses (1.5 inches deep).
Solution: Outside-mounted blackout shades with side channels (L-shaped light blockers adhered to the wall, not the recess). Added bottom channels to trap the hem bar.
Cost: $650 per window (The Shade Store, manual with side channels).
Outcome: Achieved complete darkness at 2 PM on a sunny day. Projector contrast ratio improved by 40% (measured with a lux meter).
Common Mistakes
- Ordering inside-mount blackout shades without side channels: You'll have 1-inch vertical light gaps. Outside mount or add channels.
- Choosing black backing for south- or west-facing windows: Your room will become a greenhouse. Use white backing unless you specifically need heat absorption (rare).
- Ignoring the depth of the window recess: Blackout shades with side channels need 2.5-3 inches of depth. If your recess is shallower, outside mount is mandatory.
- Buying motorized shades without checking Thread/Matter compatibility: Proprietary systems (Somfy RTS, Hunter Douglas Gen 2) require expensive hubs and lock you into one ecosystem. Matter-enabled motors work with any smart home platform.
- Not accounting for window cranks or locks: Measure clearance on all sides. I've had to remake shades twice because clients forgot about protruding hardware.
Final Recommendations
Use this if you're still unsure which route to take:
- Budget under $100 per window + rental/temporary: IKEA Tretur or Fyrtur (fixed sizes).
- Budget $150-$400 + bedrooms/offices: SelectBlinds Premium Blackout or Blinds.com Signature (custom, fiberglass if >6 feet wide).
- Budget $500+ + smart home integration: Eve MotionBlinds (Matter) or Lutron Serena (if you already have a Lutron system).
- Must achieve 100% blackout: Outside mount with 4-inch overlap per side OR inside mount with aluminum side channels.
- Hot climate (Phoenix, Houston, Miami): White backing mandatory. Consider dual shades (blackout + solar screen) for maximum heat rejection.
- Large windows (>8 feet wide or tall): Fiberglass fabric + hardwired motor. Polyester will sag and curl.
- Home theater or photography studio: Side channels + bottom channels. Test with a lux meter before final payment.
Blackout roller shades are a mechanical solution to a physics problem—blocking light while managing heat. The decisions you make about fabric substrate, backing color, and mounting method will determine whether you achieve true blackout or just "mostly dark." In 2025, with new safety regulations and smart home standards, the market has shifted toward cordless and motorized systems that integrate seamlessly into modern homes. If you choose materials and installation methods based on the science (not just aesthetics), these shades will perform flawlessly for 10+ years.
Leave a comment
This site is protected by hCaptcha and the hCaptcha Privacy Policy and Terms of Service apply.