


After 15 years of consulting homeowners on light control solutions, I can tell you definitively: yes, roller shades can achieve blackout performance—but with critical caveats. The question isn't whether blackout roller shades exist (they do), but whether a standard roller shade alone can deliver the pitch-dark environment you're imagining. In 2025, as remote work and sleep optimization drive demand for total darkness, understanding the gap between blackout fabric and blackout systems has never been more important.
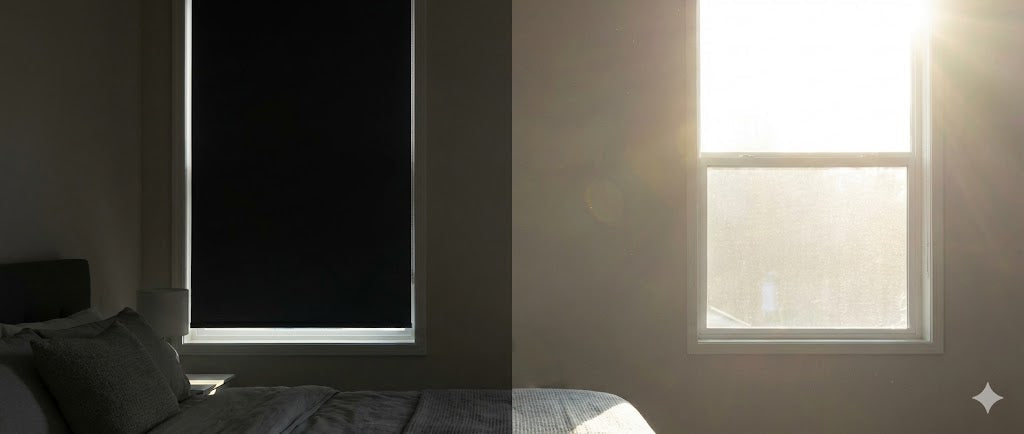
The short answer: a roller shade with blackout fabric blocks 99-100% of light through the material itself, but mechanical gaps around the edges create what we call "light halo"—ambient glow that can fill a room. True blackout requires engineered solutions beyond just fabric selection. Let me walk you through what actually works, based on hundreds of installations I've managed across residential and commercial projects.
- Blackout vs. Room Darkening
- The Mechanical Reality of Light Leakage
- Blackout Fabric Comparison & "3-Pass"
- Certifications That Matter in 2025
- How to Achieve True Blackout (Side Channels)
- Installation Methods: Inside vs. Outside
- Reverse Roll vs. Standard Roll
- Roller Shades vs. Cellular Shades
- Does Motorization Hurt Performance?
- Is Full Blackout Worth the Investment?
- Common Installation Mistakes
- Maintenance
- The Layering Strategy
- What I'd Install in My Own Home
- Conclusion
Blackout vs. Room Darkening
This is where most DIY projects go wrong. In the window treatment industry, "blackout" has a precise technical definition: 0% openness factor, meaning zero visible light transmission through the fabric weave. Products labeled "room darkening" typically filter 95-98% of light—a 2% difference that your dark-adapted eyes will absolutely notice at 3am.
I learned this the hard way on a 2019 project in Portland. A client ordered what they thought were "blackout" shades for their master bedroom, only to discover at sunrise that the room glowed like a softbox. The fabric itself was genuine blackout material—a 3-pass coated polyester with laboratory-tested 0% light transmission. The problem? Standard roller shade hardware creates unavoidable gaps.
The Mechanical Reality of Light Leakage
Here's what happens with a basic inside-mount roller shade:
- Bracket deductions: The roller tube must be shorter than the window width to spin freely between mounting brackets. Add the clutch mechanism (manual shades) or motor housing (motorized versions), and you're losing 1/2 to 11/16 inches of coverage per side. On a 36-inch window, that's over an inch of total gap where direct sunlight streams through.
- The halo effect: Light doesn't just leak through these side gaps—it reflects off your window frame's interior walls. White or light-colored trim acts as a bounce card, diffusing that razor-thin beam of sunlight into ambient room glow. I've measured rooms that go from perceived darkness to "I can read a book" brightness from less than 1/2 inch of side gap exposure.
- Top and bottom vulnerabilities: Without a cassette valance, light bleeds over the roller tube. At the bottom, unless your sill is perfectly level and the shade has a weighted hem bar that seats into a sill channel, you'll get a wedge of light underneath.
Blackout Roller Shade Fabrics
Not all blackout fabrics perform equally. Here's what I specify based on application:
| Fabric Type | Light Blockage | Best Use Case | Cleanability |
|---|---|---|---|
| PVC/Vinyl Coated | 100% | High-moisture areas (bathrooms) | Wipeable with damp cloth |
| 3-Pass Polyester | 99.9% | Residential bedrooms | Light dusting only |
| 4-Pass with Acrylic Foam | 100% | Premium installations, noise reduction | Professional cleaning recommended |
| Fiberglass/Vinyl Composite | 100% | Commercial spaces, fire code compliance | Wipeable, fire-resistant |
What "3-Pass" Actually Means
This coating terminology confuses even interior designers. Each "pass" is a layer applied during manufacturing:
- Pass 1 (base coat): White primer that bonds to the polyester substrate
- Pass 2 (blackout layer): Dense black acrylic or latex that blocks light transmission
- Pass 3 (decorative finish): The color you see—crucially, a white or light finish reflects exterior solar heat, reducing thermal gain by up to 45% compared to dark-backed shades
I specify 3-pass minimum for blackout applications. The 4th pass adds thermal or acoustic enhancement—worth it for media rooms or street-facing bedrooms where traffic noise is an issue.
Certifications That Matter in 2025
Don't just trust "blackout" on the label. Look for:
- GREENGUARD Gold certification: Low VOC emissions, critical for nurseries and bedrooms (prolonged exposure matters when fabric hangs 18 inches from your sleeping face)
- NFPA 701: Fire safety standard for commercial installations and high-rise residential
- Oeko-Tex Standard 100: Textile safety, especially important if you have chemical sensitivities
A Seattle client of mine developed headaches from off-gassing PVC shades in her home office. We replaced them with GREENGUARD-certified polyester blackout shades, and symptoms resolved within a week. Material composition isn't just about light—it's indoor air quality.
How to Achieve True Blackout
Here's where my consulting work delivers the most value—because most homeowners don't know these engineered solutions exist until they've already ordered the wrong product.
Side Channel Systems (The Game-Changer)
Side channels—also called side tracks or light-blocking channels—are the single most effective upgrade for roller shade blackout performance. These are U-shaped or L-shaped aluminum or plastic extrusions that mount to your window frame (or wall), creating a physical barrier that captures the shade's edges.
- U-Channel Tracks: The fabric edge slides inside the channel as the shade raises and lowers. This design physically encapsulates the gap. I've installed these on shift workers' bedrooms where 100% darkness is non-negotiable—at 2pm on a July afternoon, the room is indistinguishable from midnight.
- L-Shaped Light Blockers: A simpler, less expensive alternative. These don't wrap around the fabric; they just stick out to block the sight line to the gap. Effectiveness drops to about 95-98%, but installation is easier and they work with existing shades (whereas U-channels require shades designed with compatible edge systems).
A critical installation note I share with every client: if you're using adhesive-mounted channels (popular for rental-friendly installations), test in summer. I've seen 3M VHB tape fail on west-facing windows where frame temperatures exceeded 140°F. For permanent installations, I always recommend screw-mount channels—they're not coming down.
Cassette Systems for Top Light Control
Without a cassette (also called a valance or fascia), light spills over your roller tube. A cassette fully encloses the rolled fabric in a matching aluminum housing. Beyond aesthetics—it looks infinitely cleaner than an exposed roll—this eliminates what I call "top bleed."
In a 2023 home theater project in Austin, we combined cassette-mounted blackout shades with side channels. The homeowner reported that with the system deployed, their light meter registered 0.02 lux (for reference, a moonless overcast night is about 0.001 lux—this is functionally pitch black for human perception).
Bottom Sill Channels
Often overlooked but essential if your windowsill isn't laser-level. The weighted bottom bar drops into a shallow U-channel mounted on the sill. This creates a seal similar to the side channels.
Pro tip from 15 years in the field: if your sill is badly out of level (I've seen 1/2-inch variance on old homes), add a brush seal or foam weatherstripping to the bottom bar before it seats into the channel. This compresses to fill gaps and costs about $8 per window.
Installation Methods
This decision determines whether you need expensive side channels at all.
Inside Mount: Clean Look, Compromised Performance
Mounting the shade inside your window frame recess creates that minimalist, built-in appearance everyone wants. But physics doesn't care about aesthetics:
- Guaranteed side gaps: Even with precise measurements, bracket deductions create that 1/2-inch-per-side light leak
- Depth requirements: You need at least 2-3 inches of recess depth, or the shade interferes with window operation
- Blackout limitation: Without side channels, inside mount blackout shades achieve roughly 85-92% light blocking in real-world conditions
I steer clients toward inside mount when layering is planned—blackout roller shade inside the frame, with decorative drapery panels hung outside to mask the side gaps. This delivers function plus visual warmth.
Outside Mount: Maximum Coverage Without Side Channels
Here's the approach I use when clients want blackout on a budget: mount the shade outside the window frame and oversize it dramatically.
- The overlap strategy: Specify shade width at window frame width plus 4-6 inches per side (8-12 inches total wider). When lowered, the fabric overlaps the frame completely, blocking the direct light path. I've achieved 90-95% light blocking this way without any side channel investment.
- The trade-off? You completely cover your window trim. On homes with beautiful original millwork, this pains me—but for rental properties or budget-conscious projects, it's the most cost-effective path to near-blackout conditions.
- Mounting height trick: Install the brackets 4-6 inches above the frame. This adds visual height to your window and ensures the cassette (if used) sits above any light leakage point.
Reverse Roll vs. Standard Roll: A Mistake I See Constantly
Standard roll configuration has fabric dropping from the back of the tube (closest to the window glass). Reverse roll drops from the front. For blackout applications, always choose standard roll.
Why? Reverse roll positions the fabric several inches forward of the glass, dramatically increasing the air gap where light can reflect and scatter. I once consulted on a failed DIY project where the homeowner had ordered reverse roll blackout shades because they "looked better with the hardware." The room was 40% brighter than it should have been—we had to reorder and reinstall correctly.
Exception: You have a window crank or protruding hardware that physically interferes with the shade. In that case, reverse roll is necessary, but accept that you'll need side channels to compensate for the increased gap.
Roller Shades vs. Cellular Shades for Blackout
Clients always ask: "Should I just get cellular shades instead?" Here's my honest technical comparison:
| Performance Factor | Blackout Roller Shades | Blackout Cellular Shades |
|---|---|---|
| Edge Light Leakage (no channels) | 1/2 to 11/16 inch per side | 1/8 to 3/16 inch per side |
| Light Blockage (with side channels) | 99-100% | 99-100% |
| Thermal Efficiency (R-value) | 1.3-2.3 | 4.0-5.0 (double-cell) |
| Durability in High-Use Areas | Excellent (solid fabric) | Good (cellular structure can compress) |
| Moisture Tolerance | High (PVC options) | Low (fabric cells trap humidity) |
The honest assessment: Cellular shades have a natural advantage in light-gap reduction because their pleated structure can compress against the frame, and they have smaller mechanical tolerances. But once you add side channels to a roller shade, that advantage evaporates—both hit 99%+ blockage.
Where cellular shades genuinely win is thermal performance. That honeycomb structure creates dead air space with an R-value that crushes flat roller fabric. For clients prioritizing energy efficiency alongside blackout, I recommend cellular. For bathrooms, kitchens, or any space where cleanability and moisture resistance matter, roller shades are superior.
Does Motorization Hurt Performance?
Short answer: slightly, but modern motors have narrowed the gap.
Traditional motorized shades used external battery wands or bulky motor housings that increased side gaps to 3/4 inch or more. Newer 2025 technology has largely solved this:
- Internal lithium-ion motors: Brands like Lutron, Hunter Douglas, and PowerShades now use slim-profile motors entirely contained within the roller tube. These reduce side gaps back to 1/2 inch—similar to manual clutch systems.
- Rechargeable vs. hardwired trade-offs: Rechargeable motors need clearance for the charging port (usually adds 1/8 inch of gap). Hardwired motors eliminate this but require an electrician. For blackout applications, I specify hardwired when possible.
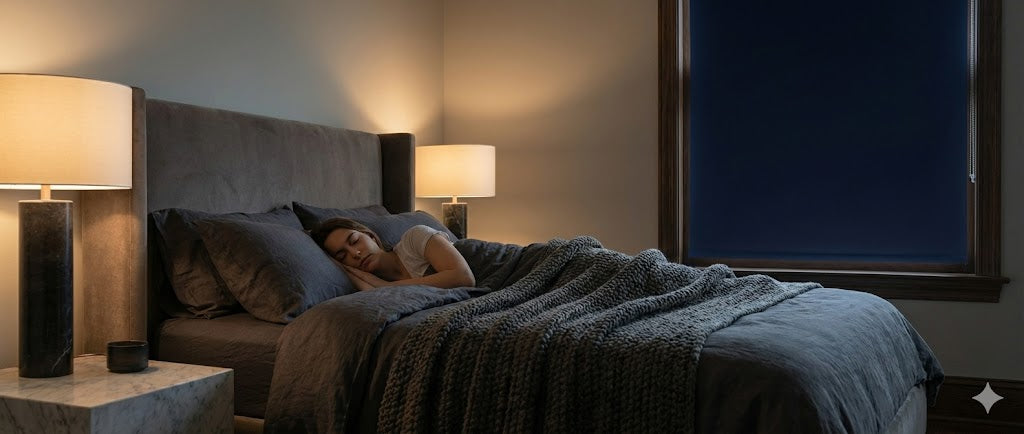
- Smart home integration value: Beyond convenience, automation enables circadian rhythm programming. I set up systems where blackout shades close automatically at sunset and open gradually 15 minutes before the alarm—simulating dawn even in windowless-facing bedrooms. This addresses the psychological "bunker effect" some clients report with 24/7 blackout capability.
One caution from experience: cheap motorization can be louder than you expect. In a 2022 nursery installation, the budget motor's operational noise woke the baby every time it activated. We upgraded to a Somfy Glydea motor (near-silent), problem solved. For bedrooms, specify motors rated under 40 decibels.
Is Full Blackout Worth the Investment?
Let's talk real numbers. For a standard 36x60-inch window:
| Configuration | Cost Per Window | Light Blockage | Best For |
|---|---|---|---|
| Basic: Inside mount, no channels | $80-$150 | 85-92% | Moderate light sleepers, budget-conscious |
| Mid-tier: Outside mount (oversized) | $120-$250 | 90-95% | Renters, DIY-capable homeowners |
| Professional: Side channels + cassette | $300-$650 | 99-100% | Shift workers, home theaters |
| Premium: Motorized + full blackout hardware | $700-$1,500 | 100% + automation | Luxury homes, smart home integration |
When to splurge on the system: You're a shift worker whose sleep schedule depends on afternoon darkness. You're building a dedicated home theater. You live on a busy street with LED streetlights that never turn off. You have diagnosed photophobia or sleep disorders aggravated by light.
When basic is enough: You're a normal sleeper who just wants to reduce morning sun glare. You plan to layer with curtains anyway. You have budget constraints and can accept 90% darkness as "good enough."
A Chicago client once told me the $2,400 investment in motorized blackout systems for three bedrooms paid for itself in improved sleep quality within six months—he stopped needing sleep aids and reported better work focus. That's subjective, but consistent with research linking light exposure to melatonin suppression.
Common Installation Mistakes
Mistake 1: Measuring Only the Window Frame. Many people measure only the visible glass or frame opening. For outside mount blackout, you must measure the area you want to cover—including trim and an additional overlap margin.
My specification formula: Window frame width + 8 inches (minimum), frame height + 4 inches. This ensures complete frame coverage with margin for uneven walls.
Mistake 2: Ignoring Window Depth for Inside Mount. You need adequate recess depth for the shade to clear window locks, cranks, or protruding sills. Minimum: 2 inches for fabric clearance. I recommend 3 inches to accommodate cassette systems.
Pro measurement tip: Use a rigid ruler, not a tape measure. Tape measures sag and give false readings on vertical measurements. I learned this the expensive way when a $600 custom shade arrived 1/4 inch too wide because my apprentice used a floppy tape.
Mistake 3: Adhesive Channels on Hot Windows. As mentioned earlier, adhesive-mount side channels fail in high-heat conditions. If your window gets direct afternoon sun, surface temperatures can exceed the adhesive's rated tolerance (usually 120-140°F for premium tapes).
Field fix: Supplement adhesive with clear silicone caulk along the back edge of the channel. This creates a heat-resistant bond without visible fasteners. For permanent solutions, use screw mounts—ugly but failsafe.
Mistake 4: Buying Based on Fabric Alone. Retailers love to sell "blackout fabric" as a standalone solution because it's simple inventory. But as this entire article demonstrates, fabric is just one variable. A complete blackout system requires coordination of fabric, hardware, mounting strategy, and installation precision.
Maintenance
- Cleaning frequency: PVC/vinyl blackout fabrics should be wiped monthly with a damp microfiber cloth to prevent dust buildup that can reflect light (yes, even dust impacts blackout performance). Polyester fabrics can be vacuumed with a brush attachment.
- Side channel care: Every 6 months, remove accumulated dust from the channel slots using a vacuum crevice tool. Dust buildup creates friction that makes the shade harder to operate and can eventually damage fabric edges.
- Pinhole degradation: Low-quality blackout fabrics develop tiny pinholes after 3-5 years of UV exposure—coating breakdown that looks like stars on your shade. High-quality 3-pass or 4-pass fabrics with UV stabilizers last 10-15 years before degradation. This is why I never recommend the cheapest option for windows with direct sun exposure.
- Motorization battery life: Rechargeable lithium-ion motors typically last 400-600 cycles per charge (roughly 6-12 months of daily use). Plan for annual recharging. Hardwired motors eliminate this concern but cost more upfront.
The Layering Strategy
For clients who want blackout function but aren't willing to sacrifice architectural detail with outside-mount shades, I recommend the layering approach:
- Layer 1 (inside mount): Blackout roller shade provides core light blocking (85-92%) and maintains clean lines when raised.
- Layer 2 (outside mount): Decorative drapery panels in a coordinating fabric. These don't need blackout lining—their job is to cover the side gaps created by the roller shade. Even sheer or light-filtering drapery panels reduce remaining light by 50-70%, bringing total blockage to 95%+.
Acoustic bonus: Fabric drapery adds sound absorption that flat roller shades lack. In a 2024 Manhattan project facing a fire station, we used this combo—blackout rollers for darkness, heavy linen drapes for noise reduction. Client reported 40% perceived noise decrease based on decibel measurements.
Cost consideration: This is actually more economical than a full side-channel system. Basic blackout roller + mid-range drapery typically costs $250-$400 per window vs. $400-$650 for engineered channels.
What I'd Install in My Own Home
If I were outfitting my own bedroom today, here's exactly what I'd specify:
- Product: 3-pass polyester blackout roller shade in warm white, GREENGUARD Gold certified
- Mounting: Outside mount, oversized by 10 inches width (5 inches per side), 4 inches height
- Hardware: Manual clutch system (I'm not a motorization person for bedrooms—I like the tactile control)
- Enhancement: Simple L-shaped PVC light blockers on the sides, screw-mounted
- Layering: Natural linen drapery panels for softness and to mask the light blockers
This setup delivers 96-98% light blocking at about $300 per window—the sweet spot of performance, aesthetics, and budget. For spare bedrooms or offices where 90% is sufficient, I'd skip the light blockers entirely and save $50 per window.
For a home theater or if I worked night shifts, I'd upgrade to the full U-channel system with cassette—no compromises on darkness when it's functionally critical.
Conclusion: Can Roller Shades Be Blackout?
The technically accurate answer: roller shades with blackout fabric block 99-100% of light transmission through the material, but standard installations allow 8-15% ambient light leakage through mechanical gaps.
The practically useful answer: yes, roller shades can achieve genuine blackout performance—when specified as part of an engineered system rather than purchased as a standalone fabric product. That system includes side channels, cassette enclosures, proper mounting strategy, and installation precision that accounts for your specific window geometry.
After consulting on hundreds of blackout installations, my core advice is this: be honest about your darkness needs. If you're a typical sleeper who just wants to reduce morning glare, a basic blackout roller shade will probably satisfy you. If you're truly light-sensitive or need functional darkness (shift work, home theater), invest in the channel system—half-measures will disappoint.
And if you're unsure, start with an oversized outside-mount shade. It's the most forgiving approach that delivers strong results without permanent modifications. You can always add channels later if needed, but you can't un-drill screw holes.
The bottom line from 15 years in this industry: blackout roller shades work brilliantly—when you understand what you're actually buying and how to install it properly. Don't trust marketing labels alone. Understand the physics, plan your system, and you'll get the darkness you're paying for.
Leave a comment
This site is protected by hCaptcha and the hCaptcha Privacy Policy and Terms of Service apply.