

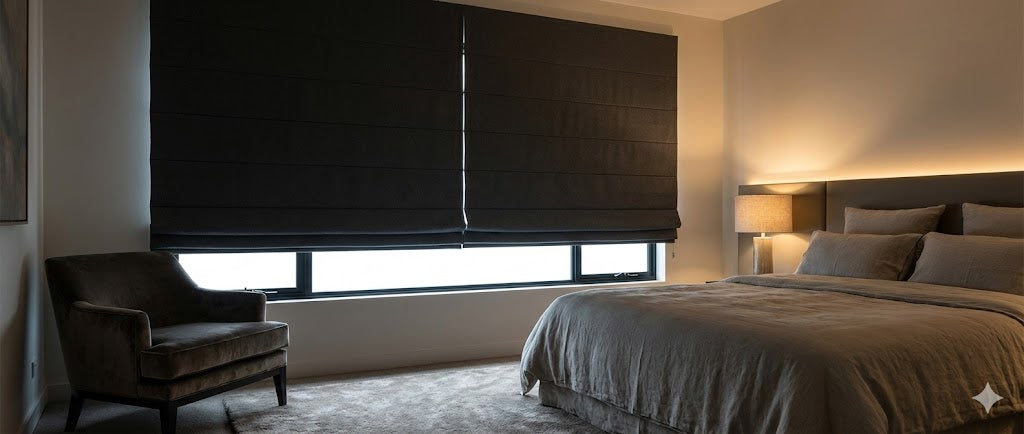
Yes, you absolutely can install blackout shades behind existing blinds—and in my 15 years working with homeowners across North America, this layered approach has become one of my most recommended solutions for clients who love their decorative blinds but need better light control.
I recently helped a family in Portland who had beautiful 2-inch faux wood blinds in their nursery, but the light gaps between slats were disrupting their baby's sleep schedule. Rather than replacing those $400 blinds, we added blackout cellular shades mounted directly behind them for under $80 per window. The transformation was immediate—complete darkness when needed, with the blinds still providing daytime light filtering and curb appeal.
- Window Depth Analysis: Can It Fit?
- The Hybrid Mounting Strategy
- Cellular vs. Roller Shades: A Comparison
- Step-by-Step Installation Sequence
- Aesthetic Integration: Making It Look Intentional
- Cost-Benefit Analysis
- Energy Efficiency & ROI
- Maintenance & Cleaning
- Common Mechanical Issues & Fixes
- Final Decision Framework
Understanding the Space Requirements: Window Depth Analysis
The most critical factor determining whether this dual-layer system will work in your home is window jamb depth—the distance from the glass surface to the front edge of your window frame. Through measuring hundreds of windows, I've found that most modern homes built with 2x4 wall framing provide only 2.5 to 3.5 inches of usable interior depth after accounting for the window unit itself. This creates an immediate challenge when you're trying to fit two separate headrails into that limited space.
| Component | Typical Depth Required | Notes |
|---|---|---|
| Blackout cellular shades (rear layer) | 0.75–2 inches | Cordless systems are most compact |
| Blackout roller shades (rear layer) | 1.5–2.5 inches | Cassette-style systems require more depth |
| 2-inch wood/faux wood blinds (front layer) | 2.5–3.5 inches | Includes headrail and optional valance |
| Total for flush dual inside mount | 5–6 inches minimum | Uncommon in standard residential construction |
Here's where most DIY attempts fail: people assume they can simply mount both treatments inside the frame without checking actual clearance. When I measure a window for this setup, I use a steel tape to record three specific dimensions:
- Clear depth from glass to frame edge – This is your absolute maximum
- Obstruction mapping – Window locks, handles, and cranks often protrude 1–1.5 inches from the glass plane, effectively reducing your usable depth
- Diagonal measurements – Older homes may have out-of-square frames that cause binding when shades are lowered
Pro tip: If your window has a protruding handle or lock, measure from the front of that hardware, not from the glass. That becomes your new zero point for depth calculations.
The Hybrid Mounting Strategy That Actually Works
Since most standard window frames cannot accommodate two fully recessed treatments, the solution I use in roughly 80% of my dual-layer projects is what I call the "hybrid mount":
- Rear layer (blackout shade): Inside mount, positioned as close to the glass as thermal safety allows.
- Front layer (blinds): Outside mount or semi-recessed, using spacer blocks to push the blinds slightly into the room.
This configuration maximizes the use of your limited jamb depth while maintaining a polished appearance. The blackout shade becomes your functional utility layer—often white or off-white to blend with the window frame—while the decorative blinds remain the visual focal point.
When I install blinds in this pushed-forward position, the side gaps become visible from certain angles. To address this, I always specify valances with extended side returns—essentially, the valance wraps around the sides of the blind headrail, creating an enclosed box that conceals all the internal hardware and the shade mechanism behind it.
Cellular Shades vs. Roller Shades: The Technical Comparison
The two primary blackout options for rear-layer installation are cellular (honeycomb) shades and roller shades. After installing hundreds of each, I have strong opinions about when to use which type.
Cellular Shades: My Default Recommendation for Most Applications
Cellular shades—constructed from spunbond polyester fabric formed into hexagonal honeycomb cells—offer three distinct advantages in dual-layer systems:
- Exceptional stack height compression: When fully raised, even a 60-inch cellular shade compacts to just 2–3 inches at the top of the window. This minimal stack means it can hide completely behind the blind headrail or valance.
- Superior thermal performance: The trapped air within each cell creates an insulation barrier with R-values ranging from 2.0 to 5.0. In a Chicago townhouse project last winter, my clients reported a 22% reduction in heating costs for rooms where we installed double-cell blackout shades.
- Minimal side gap light bleed: The fabric width of cellular shades extends very close to the window frame edges—typically within 1/8 inch on each side.
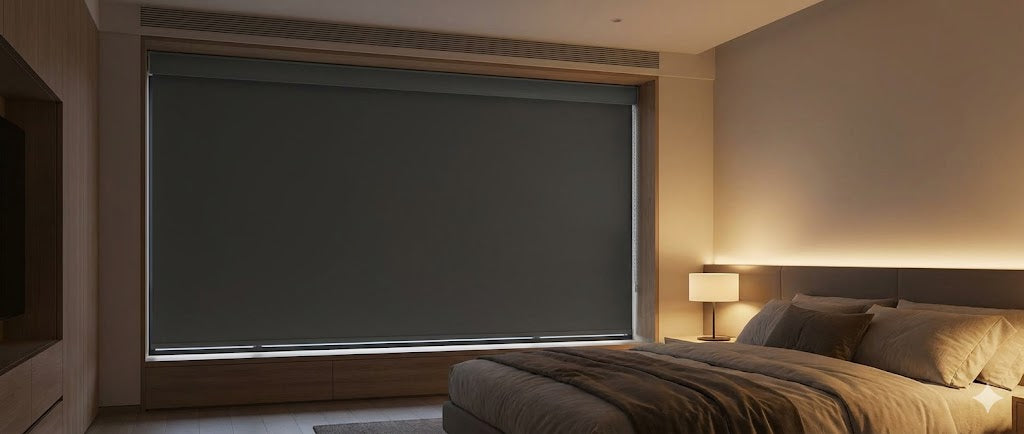
Roller Shades: When Durability and Ease of Cleaning Matter
Roller shades consist of a single layer of fabric wrapped around a tube mechanism. While they lack the thermal efficiency of cellular construction, they excel in certain scenarios:
- Heavy-use durability: Vinyl-backed blackout roller fabric is nearly indestructible. I specify these for children's rooms, rental properties, and commercial applications.
- Simplified cleaning: Unlike cellular fabric, roller shade material can be wiped down with a damp cloth. For a client with severe dust allergies, this feature alone justified choosing rollers over cellular.
- Reverse-roll configuration: By requesting a reverse-roll configuration, the fabric hangs down the front side of the tube, creating an additional 1.5–2 inches of clearance between the fabric and the glass—exactly enough space to clear a protruding window crank or locking lever.
| Performance Factor | Blackout Cellular Shades | Blackout Roller Shades |
|---|---|---|
| Stack height when raised | Excellent (2–3") | Moderate (3–5") |
| Side gap light control | Minimal | Significant |
| Thermal insulation (R-value) | High (R-2.0 to R-5.0) | Low (R-1.0 to R-1.8) |
| Cleaning | Difficult (compressed air) | Easy (wipe clean) |
| Cost range (36"x60") | $80–$250 | $30–$150 |
Step-by-Step Installation Sequence: Avoiding the Critical Mistakes
Installing a dual-layer system is not simply a matter of mounting two sets of brackets. The sequence matters enormously.
Phase 1: Install the Rear Blackout Layer First
Why this order matters: You need full access to the back of the window frame before the blinds obstruct your working space. More importantly, you must test the shade's operation and ensure it clears all window hardware before locking in the front layer position.
The thermal clearance rule: Even though your goal is maximum light control, never mount blackout shades directly against the glass surface. Heat trap effect is a real phenomenon that can cause glass failure. My minimum clearance standards:
- Annealed (standard) glass: 2–3 inches minimum from shade to glass
- Tempered or heat-strengthened glass: 1–2 inches acceptable
- Low-E coated glass: 2.5–3 inches
Phase 2: Installing the Front Blind Layer with Proper Spacing
Once the rear shade is installed and tested, you'll mount the blind brackets. In the majority of residential cases, you'll need spacer blocks—thin wooden or plastic shims placed behind the blind brackets to push them forward.
Determining spacer thickness: Measure the depth of the rear shade's headrail. Your spacer blocks should be thick enough to position the blind brackets at least 1/4 inch in front of the rear shade's furthest protruding point.
The valance return solution: When you push blinds forward with spacers, you create visible gaps on the sides. The professional solution is a valance with extended side returns. For a dual-layer system pushed forward by 3/4 inch, I typically specify 2-inch side returns—this provides 1.25 inches of coverage past the front of the blinds, completely concealing the internal mechanisms.
Aesthetic Integration: Making It Look Intentional, Not Improvised
The biggest mistake I see in DIY dual-layer installations is treating the rear shade as an afterthought. A well-designed system follows the "invisible utility layer" principle.
Color Strategy
The rear blackout shade should blend into the window architecture. In 90% of my projects, I specify the rear shade in white, off-white, or a color matched to the window trim. The goal is for the shade to visually disappear when raised.
Managing Stack Height
Stack height is a functional and aesthetic concern. Wood blinds have substantial stack height (9–12 inches for a 6-foot window). Cellular shades compress efficiently (2–3 inches total), making them ideal for hiding behind the blind's headrail.
Avoiding the Moiré Effect
Never install a patterned or striped fabric shade behind slatted blinds. The horizontal lines of the blind slats, when overlaid with the pattern of the shade fabric, create a moiré interference pattern—a shimmering, disorienting visual effect. Always use solid-color, matte-finish shades for the rear layer.
Cost-Benefit Analysis: Is This Worth the Investment?
For homeowners evaluating whether to add blackout shades to existing blinds versus replacing everything, the economics strongly favor the layered approach.
Scenario comparison for a typical 36" × 60" bedroom window:
-
Option A: Keep existing blinds + add rear blackout cellular shade
Total: $60–$130 per window -
Option B: Replace with premium dual-function shade
Total: $300–$600 per window -
Option C: Keep existing blinds + add blackout curtains on rod
Total: $70–$160 per window
The retrofit approach (Option A) costs 20–30% as much as a complete system replacement, while delivering comparable or better light control.
Energy Efficiency ROI
Beyond the initial cost savings, dual-layer systems provide measurable energy savings. The Department of Energy estimates that properly installed cellular shades can reduce window heat loss by up to 40% in winter and heat gain by up to 80% in summer.
In a Minneapolis duplex project, the homeowner reported a 28% decrease in their heating bill during the first winter after adding double-cell blackout shades behind existing blinds. The thermal benefit comes from two mechanisms: the insulating air cells in the shade fabric, and the additional dead air space created between the shade and the blind.
Maintenance Realities and Long-Term Care
Cleaning the Hidden Rear Layer:
- For cellular shades: Plan to fully raise your front blinds every 3–4 months to clean the cellular shade. Use a vacuum with a soft brush attachment on low suction. Never use water or liquid cleaners on cellular fabric.
- For roller shades: With the front blinds raised, simply wipe the roller shade fabric with a microfiber cloth dampened with water and a drop of mild dish soap.
Critical warning: Many blackout roller shades have a light-blocking coating or foam layer on the back side. Never use harsh chemicals or abrasive scrubbers on this coated side—you risk removing patches of the coating, which will show up as pinhole light leaks.
Common Mechanical Issues and Fixes
- Roller shade telescoping (diagonal rolling): Add 2–3 layers of masking tape to the end of the roller tube on the opposite side from the direction it's shifting. This increases the diameter slightly, causing the fabric to "walk" back toward center.
- Cordless cellular shade tension issues: If your shade falls unexpectedly, the internal tension mechanism likely needs adjustment. Most cordless systems have a small adjustment mechanism accessible from the side.
- Cord tangling: If both your blinds and shades use pull cords, they will tangle. I adamantly recommend that at least the rear shade be cordless or motorized. Motorized cellular shades have become surprisingly affordable and eliminate this problem.
Final Recommendations: A Practical Decision Framework
After evaluating all the technical, aesthetic, and economic factors, here's my decision framework for homeowners considering whether to install blackout shades behind existing blinds:
You should proceed with confidence if:
- Your window jamb has at least 2.5 inches of clear depth (or you're willing to use spacer blocks)
- Your existing blinds are in good condition and you like their appearance
- You need blackout functionality but want to retain daytime light-filtering capability
- Energy efficiency is a priority
Choose cellular shades as your rear layer if:
- You want the best possible light blocking with minimal side gaps
- Thermal insulation is important
- Stack height concealment matters
Choose roller shades as your rear layer if:
- Easy cleaning is a priority (allergies, high dust environment)
- Your window has protruding hardware (use reverse-roll configuration)
- Budget is tightest
The dual-layer window treatment approach represents a mature evolution in residential light control. It acknowledges that different times of day demand different window performance, and it provides that flexibility without the expense of complete replacement. When planned thoughtfully, it delivers hotel-quality blackout functionality while preserving the design character of your existing blinds.
Leave a comment
This site is protected by hCaptcha and the hCaptcha Privacy Policy and Terms of Service apply.