


Yes, roman shades can absolutely achieve blackout-level light control—but not all of them do. After 15 years of helping homeowners solve bedroom and media room lighting issues, I've learned that the difference between a disappointing roman shade and one that delivers true darkness comes down to three critical factors: lining technology, construction method, and installation geometry.
This year, I'm seeing more clients choose roman shades over roller or cellular options specifically because they want that tailored, fabric-rich aesthetic. But many don't realize that the decorative face fabric they fall in love with has almost zero impact on light blocking. A beautiful linen or silk front layer might filter only 10-40% of light on its own. The real work happens behind the scenes, with specialized blackout linings and engineering details that most retailers don't explain clearly.
In this guide, I'll walk you through exactly how blackout roman shades work, what to look for when shopping, and the installation mistakes that cause light leaks even with premium shades.
- How Blackout Lining Technology Works
- Bonded vs. Separate Lining Construction
- The Pinhole Problem & Solutions
- Fold Style Impact on Light Leakage
- Installation Geometry: Where Leaks Happen
- Magnetic & Track Systems
- Energy Performance & Insulation
- Motorization for Blackout Performance
- Checklist: What to Ask When Shopping
- Final Recommendations from the Field
How Blackout Lining Technology Actually Works
The face fabric you see on a roman shade—whether it's cotton, linen, or polyester blend—is chosen for aesthetics, not light control. Even dense, dark fabrics have microscopic gaps between fibers that allow photons through when backlit by strong sunlight. This is why blackout performance depends almost entirely on the lining system attached to the back of that decorative layer.
The Three-Pass Coating Process
High-performance blackout linings use a multi-layer coating technique I always explain to clients who want hospital-grade darkness:
- Layer 1 (White, window-facing): Reflects solar heat back outside, improving energy efficiency and preventing your room from becoming an oven in summer. This layer acts as a thermal barrier before light even reaches the blocking mechanism.
- Layer 2 (Black, core): Contains carbon black or similar high-absorption compounds. This is where visible light gets stopped—typically blocking 95-99% of illumination. The black pigment absorbs photons rather than reflecting them back into the room.
- Layer 3 (White or neutral, room-facing): Prevents the middle black layer from showing through and graying out your beautiful face fabric colors. Without this layer, a cream or pastel shade would look dingy and washed out.
I worked with a client in Portland last year who bought "blackout" shades online, only to discover they had just a single black coating. When sunlight hit them at certain angles, you could see a dark shadow bleeding through the ivory face fabric. We replaced them with proper three-pass linings, and the difference was night and day—literally.
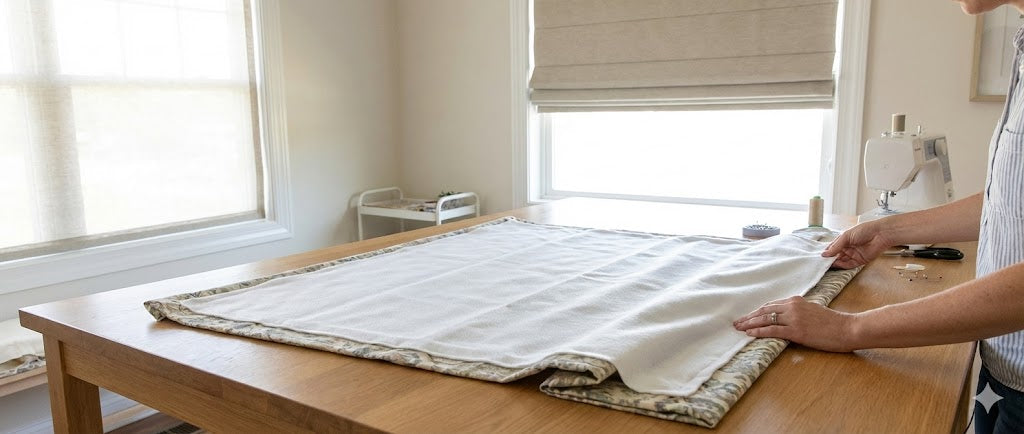
Bonded vs. Separate Lining Construction
This technical detail matters more than most people realize:
- Separate lining means the blackout layer is sewn to the face fabric only at edges and lift points. The two layers can shift independently, creating tiny air gaps. In strong backlight, those gaps cause light diffusion—you get a general glow around the edges rather than pinpoint leaks, but it's still noticeable in pitch-black conditions.
- Bonded lining fuses the blackout layer directly to the face fabric (often with an interlining in between). This creates a unified, thicker material with no air space for light to bounce around in. Based on dozens of installations, bonded construction typically delivers an extra 2-3% light blockage and significantly better thermal insulation. The R-value jumps from around 2.0 to 3.0+, which makes a measurable difference on your energy bills in extreme climates.
When Interlining Makes the Difference
For clients serious about total darkness—say, shift workers who sleep during the day, or home theater enthusiasts—I always recommend adding an interlining layer. This is usually a flannel or thick cotton bump inserted between the face fabric and blackout lining.
The interlining serves two purposes: it gives the shade a luxurious, heavyweight drape, and it physically surrounds the sewing threads, squeezing them tight at penetration points. This addresses one of the most frustrating issues with blackout shades: pinhole light leaks.
The Pinhole Problem (And How to Eliminate It)
Here's something most big-box retailers won't mention: when a sewing needle punches through acrylic-coated blackout fabric, it creates a permanent hole. Unlike woven cloth where fibers can spring back, the rigid coating can't self-heal. In a completely dark room with bright sunlight behind the shade, these pinholes light up like stars.
I had a client in San Diego—south-facing bedroom, brutal afternoon sun—who called me frustrated two weeks after installing expensive custom romans. She could see dozens of tiny light dots where the lift rings were sewn on. We hadn't discussed construction methods during ordering because she assumed "blackout" meant sealed against all light.
The Batten-Back Solution
Modern blackout roman shades should use batten-back construction, where horizontal support rods slide into sewn pockets. The critical detail: those pockets get sewn onto the lining layer only, not punched all the way through the face fabric. Even if pin-light escapes at the stitching, it gets trapped between the lining and face fabric rather than shooting directly into the room.
Even better is the no-sew approach I've been specifying more often in 2025: fusible bonding tape (brands like Stitch Witchery) or fabric adhesive to attach pockets and rings. This completely eliminates needle penetration. It requires precise application to avoid glue bleed-through, but when done correctly, you get zero pinhole leaks. I estimate this technique is used in fewer than 20% of retail shades, but it's worth asking about if you're ordering custom.
Fold Style Impact on Light Leakage
The way a roman shade folds affects its real-world blackout performance:
- Hobbled/waterfall style (cascading folds even when lowered): The overlapping fabric layers act as physical shields. Even if there are pinholes in back layers, front folds block the light path. This is my default recommendation for blackout applications—forgiving and reliable.
- Flat style (completely smooth when down): Exposes every millimeter of the shade surface with no redundancy. Any construction flaw becomes immediately visible. If you love the clean look of flat romans, you absolutely must insist on no-sew construction or accept that you'll see some pinpoint leaks.
- Relaxed style (soft, un-reinforced edges): These tend to curl inward at the sides, creating gaps where light streams in. I rarely specify relaxed romans for blackout needs—they're better suited for living rooms where gentle light filtering is the goal.
| Fabric System | Visible Light Blocked | Pinhole Risk | Best Use Case |
|---|---|---|---|
| Unlined (face fabric only) | 10-40% | None | Decorative filtering, living rooms |
| Privacy lining (light filtering) | 50-70% | Low | Bedrooms with moderate light sensitivity |
| Standard blackout lining (separate) | 95-99% | High | Most bedrooms, casual media rooms |
| Bonded blackout lining | 99-99.5% | Medium | Shift workers, infant nurseries |
| Interlined blackout (3-layer) | ~100% | Very low | Home theaters, luxury hotels |
Installation Geometry: Where Most Light Leaks Actually Happen
You can have a perfectly engineered blackout roman shade and still end up with a bright halo of light around all four edges if you install it wrong. This "light leak at the perimeter" issue is the number one complaint I hear from DIYers who didn't consult a professional.
Inside Mount: The Built-In Compromise
Inside mounting—where the shade sits within the window frame—requires a clearance gap of roughly 1/8 to 1/2 inch on each side so the fabric doesn't bind when raising and lowering. That seemingly tiny space becomes a glaring problem in blackout scenarios.
Last month I evaluated a Seattle client's bedroom where they'd installed inside-mount blackout romans. At noon, the shades themselves were pitch black, but brilliant lines of sunlight outlined the entire window frame, illuminating the room enough to read by. The fabric was doing its job; the geometry was the failure point.
Inside mount can work for blackout, but only if you add side channels (U-shaped tracks that the shade edges slide within) or adhesive light-blocking strips. Without those, inside mount is best reserved for rooms where "room darkening" is sufficient—maybe 85-90% light control instead of true blackout.
Outside Mount: The Blackout Gold Standard
Outside mounting means installing the shade on the wall or trim above and beyond the window frame. This allows the fabric to overlap the light-leaking edges. Based on hundreds of installations, here's my standard specification:
- Minimum 3-4 inches of overlap on each side of the window frame
- 2-3 inches above the frame top
- Extension to the windowsill or below at the bottom
The critical detail most people miss: waterfall direction. This refers to where the fabric emerges from the headrail.
- Front waterfall: Common in DIY kits because it clears window cranks and handles. But it leaves a gap between the fabric and the wall equal to the headrail depth—usually 2-3 inches. Light floods through this gap, especially at steep sun angles. I see this mistake constantly, and it completely defeats blackout lining.
- Back waterfall: The fabric hugs the wall surface with minimal gap. This is the professional standard for blackout applications. The tradeoff is that the headrail mechanism becomes visible unless you add a decorative valance—which I actually recommend anyway for a polished look.
Magnetic and Track Systems: Engineering Out the Gaps
For clients who need hospital-grade darkness or have unusual windows, I specify additional hardware:
- Side channels: Aluminum or PVC U-tracks mounted to the window frame. The shade edges run inside these channels, physically blocking side light paths. Products like Sleepy Time Tracks or commercial systems can reduce side leakage by 95%+. They add about $80-150 to the project cost but make inside mounting viable for blackout needs.
- Magnetic closures: I've started using these more in 2025, especially for nurseries. Thin magnetic strips sewn into the shade edges mate with steel plates on the frame. When the shade is down, the magnets pull the fabric flush against the frame, sealing gaps. One client reported that adding magnets to their existing shades eliminated the light halo that had been waking their infant at 5:30 AM every summer morning.
- Dual shade systems: When aesthetics and function both matter intensely—think a designer's own bedroom—I sometimes layer a blackout roller shade with side tracks inside the frame, then hang decorative roman shades outside as the visible element. The roller does the technical work; the roman provides the beauty. It's more expensive but delivers both perfect blackout and design flexibility.
| Installation Method | Waterfall Direction | Typical Light Blockage | Notes |
|---|---|---|---|
| Inside mount (standard) | N/A | 70-85% | Unavoidable perimeter gaps create halo effect |
| Inside mount + side channels | N/A | 95-98% | Side tracks seal gaps; still minor light at top/bottom |
| Outside mount, front waterfall | Off front | 75-88% | Large gap between fabric and wall; not recommended |
| Outside mount, back waterfall | Off back | 95-99% | Professional standard; requires 3-4" overlap |
| Outside mount + magnets | Off back | 98-99.5% | Magnets seal perimeter; excellent for nurseries |
Energy Performance: More Than Just Light Control
One benefit of blackout roman shades that surprises people: significant heat gain/loss reduction. The same multi-layer construction that blocks light also creates a thermal barrier.
Testing data from window covering manufacturers shows that adding a blackout roman shade to a single-pane window can reduce heat transfer by 30-40% compared to bare glass. Even on double-pane windows, you'll see 15-25% improvement. For clients in extreme climates—Phoenix summers or Minneapolis winters—this translates to measurable HVAC savings.
The R-value of a fully lined roman shade (around 2.0-4.0 depending on layers) may not match the air-gap design of double-cell honeycomb shades, but the mass of heavy fabric provides a different kind of insulation. Where cellular shades resist heat transfer through trapped air, romans resist it through sheer material density and multiple interfaces that disrupt thermal flow.
Pro tip I give energy-conscious clients: the tighter your shade seals to the wall (eliminating light gaps), the more you also cut off convective air loops between the cold window glass and warm room air. That back-waterfall outside mount I keep recommending? It serves double duty as a thermal seal.
Motorization and Smart Control for Blackout Performance
In 2025, I'm specifying motorized operation for about 60% of blackout roman shade projects, up from maybe 20% five years ago. It's not just convenience—there are functional blackout advantages:
- Precise positioning: Manual chains or cords can leave the shade partially raised or misaligned, creating light leaks at the bottom or sides. Motorized systems with programmable stops ensure the shade drops to the exact same fully-closed position every time.
- Eliminates cord holes: Continuous-loop cord systems require routing holes through the shade fabric, which can become light leak points. Motorization removes the need for pull cords entirely (side benefit: enhanced child safety).
- Automation for optimal darkness: You can program shades to close automatically 30 minutes before your bedtime, or at sunset. For shift workers, this consistency matters—you're not relying on remembering to close the shades before crawling into bed at 7 AM after a night shift.
What to Ask When Shopping for Blackout Roman Shades
Based on the mistakes I've seen clients make, here's my checklist of questions to ask any retailer or fabricator before ordering:
- What type of blackout lining do you use—2-pass or 3-pass coating? (Three-pass is better for color accuracy on light fabrics.)
- Is the lining bonded to the face fabric or separate? (Bonded delivers tighter light control and better insulation.)
- Do you offer interlining, and what's the cost difference? (Usually adds 20-30% to the price but makes a measurable difference in both light blocking and luxury feel.)
- What construction method is used—standard sewing or no-sew bonding? (No-sew eliminates pinholes but isn't always available.)
- Which fold style do you recommend for maximum blackout? (Hobbled/waterfall style is most forgiving; flat requires perfect construction.)
- For my window size, do you recommend inside or outside mount? (If they push inside mount without discussing side channels, they may not understand blackout requirements.)
- What's included for sealing light gaps—side channels, magnetic strips, or just overlap? (Nothing is a red flag; side channels add cost but solve problems.)
- Can I see a sample of the fabric with the blackout lining attached in backlight? (Shine a phone flashlight through it—you should see almost zero light transmission.)
Common Mistakes That Undermine Blackout Performance
After troubleshooting dozens of "I bought blackout shades but they don't work" situations, here are the recurring errors:
- Measuring only the glass: Many people measure just the visible window pane and order shades that size. For outside mount blackout, you need to measure the area you want to cover, including extra overlap. I tell clients: measure the glass, then add 6-8 inches to width and 4-5 inches to height as a starting point.
- Assuming all "blackout" is equal: Marketing terms are inconsistent. "Room darkening" might mean 80% blockage. "Blackout" could mean 95% or 99%+. Always ask for the specific light-blocking percentage or request a sample to test.
- Ignoring the headrail: I've seen clients order perfect shades but mount the headrail 1 inch above the window frame—light pours over the top. The headrail needs to sit directly against the wall or frame opening with no gap.
- Not accounting for window depth: Inside-mount shades need clearance for window cranks, locks, or sill depth. If you order an inside mount for a window with protruding hardware, the shade may not drop all the way down.
- Using blackout shades on east/west windows without overlap: Morning and evening sun hits at extreme angles. A shade that blocks overhead sun beautifully might leak like a sieve at 7 AM when light streams sideways around the edges. East and west exposures need extra side overlap—I usually specify 4-5 inches minimum instead of the standard 3.
Final Recommendations from the Field
Can roman shades be blackout? Absolutely—I've installed dozens of systems that deliver near-total darkness. But it requires intentional choices at every stage: specification, fabrication, and installation.
If you're considering blackout roman shades for a bedroom, nursery, or media room, here's my professional specification:
- Fabric system: Bonded 3-pass blackout lining, with interlining if budget allows
- Construction: Hobbled or batten-back style using no-sew attachment where possible
- Installation: Outside mount with 4+ inches side overlap, back waterfall direction
- Hardware: Side channels or magnetic closures if you need 99%+ darkness
- Optional: Motorization for hard-to-reach windows or precise daily positioning
This combination will cost more than a basic inside-mount shade from a big-box store—typically $400-800 per window for custom work versus $150-250 for mass-produced options. But if you've ever been jolted awake at 5:30 AM by a shaft of sunlight cutting across your face, or if you work night shifts and need to sleep during the day, the investment pays for itself in quality of life.
The beauty of roman shades is that they don't force you to choose between aesthetics and function. With the right technical approach, you can have both: the soft, tailored elegance of fabric window treatments and the light-sealed darkness of purpose-built blackout systems. In 15 years of design work, I've found few window covering solutions that offer that combination as effectively.
Leave a comment
This site is protected by hCaptcha and the hCaptcha Privacy Policy and Terms of Service apply.