


In my 15 years as a window treatment consultant, I've helped hundreds of clients solve what seems like a simple problem: making roman shades truly block out light. The challenge isn't just about adding dark fabric—it's about understanding why most DIY blackout attempts fail, and what separates a shade that "sort of works" from one that creates complete darkness.
The biggest mistake I see? People assume any thick fabric will do the job. But when you hang that finished shade and sunlight streams through tiny pinholes along every seam, you realize blackout roman shades require specific materials and construction methods. This guide shares the exact techniques I use in my workshop, including how to eliminate those telltale light leaks that ruin otherwise beautiful shades.
- Understanding True Blackout vs. Room Darkening
- Materials Selection: What Actually Works
- Blackout Lining: The Core Component
- The Interlining Solution
- Measurements and Mathematical Planning
- Method 1: Traditional Sewn (Pinhole Mitigation)
- Method 2: Thermal Bonding (No-Sew)
- Method 3: DIY Adhesive Approach
- Safety Engineering: ANSI/WCMA Compliance
- Light Gap Blocking: Architectural Integration
- Troubleshooting and Maintenance
Understanding True Blackout vs. Room Darkening
Before you cut any fabric, you need to understand what "blackout" actually means. I've had clients show me shades they thought were blackout, only to find they're technically "room darkening"—a completely different performance category.
True blackout fabric achieves 100% opacity through multiple acrylic foam coating layers applied to the base textile. When I test blackout lining in my studio, I hold it against a 1000-lumen work light. If I see even a faint glow, it's not true blackout. The standard industry specification requires three coating passes:
- Pass 1: A white primer coat that fills the fabric's weave structure.
- Pass 2: A carbon-black middle layer that blocks photons in the 380-750nm visible spectrum.
- Pass 3: A white or cream top coat that reflects solar radiation.
Room darkening fabrics use a different approach called triple-weave construction—two colored yarn layers sandwich a black center thread. These block 70-95% of light. In high-contrast lighting conditions, even 5% light transmission creates visible glow around the shade's edges and along fold lines.
The thermal performance difference matters too. Blackout lining's non-porous acrylic coating significantly reduces air permeability, creating a "dead air space" between the window glass and your room.
Materials Selection: What Actually Works
Face Fabric Considerations
Your visible fabric layer isn't just decorative—it needs specific physical properties to work with blackout lining without telegraphing every structural element underneath.
- Weight: Medium to heavy-weight fabrics (8-12 oz per square yard) provide the best results. Cotton twill and cotton-polyester blends are ideal.
- Linen: The loose weave means light penetrates easily. If using linen, you must add an interlining layer.
- Silk: Generally avoid. It degrades rapidly under UV exposure (sun rot) and is too thin to hide the stiff lining behind it.
- Polyester Blends: The 2025 recommendation. Modern blends resist UV degradation and maintain consistent dimensions through humidity changes.
Blackout Lining: The Core Component
This is where true blackout performance lives or dies. Understanding coating technology prevents expensive mistakes.
| Coating Type | Layer Structure | Light Block | Best Application |
|---|---|---|---|
| 2-Pass Coated | Base + black layer + dark face | 95-98% | Budget projects where slight light leakage acceptable |
| 3-Pass Coated | White primer + black + white/cream face | 99-100% | Standard professional blackout romans |
| 4-Pass Coated | 3-pass + microfiber or flocked layer | 100% | High-end residential, noise reduction priority |
| Triple-Weave | Woven black center thread | 85-95% | Room darkening only, not true blackout |
The Interlining Solution
Professional workrooms have a secret weapon most DIY guides skip: interlining. This is a separate layer installed between your face fabric and blackout lining, typically made from cotton flannel or a thick cotton batting called "bump."
Interlining fills in pinholes, adds visual depth, and increases thermal resistance. I use interlining on approximately 60% of my blackout roman shade projects, specifically when using lightweight face fabrics or when clients are extremely sensitive to light leakage.
Measurements and Mathematical Planning
Inside Mount vs. Outside Mount: The Blackout Implications
This decision fundamentally affects your light control outcome.
- Inside Mount: Requires a 1/4 to 1/2 inch gap on each side for operation. This creates inevitable light halos. If complete darkness is the goal, avoid inside mounts unless you plan to add side channels.
- Outside Mount: The professional solution for blackout. The shade mounts on the wall surface above the window, overlapping the frame.
Formula for Outside Mount: Shade width = window frame width + 10 to 12 inches (5-6 inches extension each side). Shade length = mounting point to window sill + 4 inches below sill.
Calculating Fold Spacing and Stack Height
Roman shades operate through a series of horizontal folds. Blackout lining is thicker, so each fold consumes more vertical space (stack height). Typical blackout shade stack height is 10-12 inches. Mount your shade at least 4 inches above the window frame to ensure the stack doesn't block the glass when raised.
Example Calculation:
- Finished shade length: 60 inches. Headrail profile: 2.5 inches.
- Workable fabric: 60 - 2.5 = 57.5 inches.
- Divide by odd numbers for spacing: 57.5 ÷ 5 = 11.5 inches, or 57.5 ÷ 7 = 8.2 inches.
Why odd numbers? It ensures the bottom section is a half-fold, allowing the decorative bottom bar to tuck neatly behind the stack.
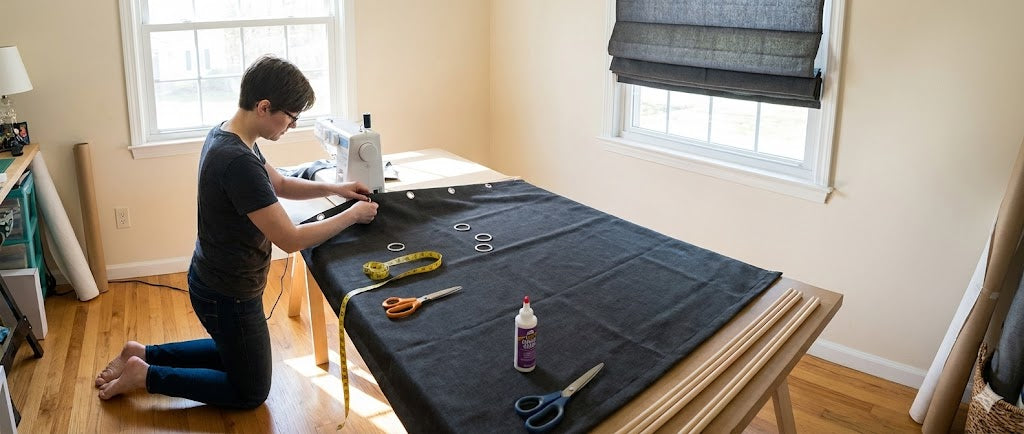
Construction Method 1: Traditional Sewn with Pinhole Mitigation
This is the durable, professional approach, but it requires addressing the "pinhole problem"—every needle hole allows light through.
The Solution: Segregated Layer Construction (Stab Stitching)
Instead of sewing through all layers at once, you create dowel pockets on the lining only.
- Hem Face Fabric: Create double-fold side hems on the face fabric.
- Prepare Lining: Create dowel pockets on the blackout lining using strips of matching fabric. Stitch only through the pocket fabric and lining.
- Attach Rings: Hand-sew lift rings to the dowel pockets.
- Join Layers: Use stab stitching. Pierce from the lining side, barely catching 2-3 threads of the face fabric, and return to the lining side. This anchors the layers without visible stitches on the front.
Needle and Thread Selection: Use Microtex or Sharp needles (size 70/10 or 80/12) to pierce the coating cleanly. Use textured polyester or mercerized cotton thread to help "plug" the holes.
Pinhole Remediation
Even with perfect technique, ring attachment points may leak light.
- Method 1: Use a tiny dab of white fabric paint or correction fluid on the coated side of the lining over pinholes.
- Method 2: Use white blackout patching tape for larger holes.
Construction Method 2: Thermal Bonding (No-Sew Excellence)
Thermal bonding uses heat-activated adhesives to avoid puncturing the blackout lining entirely. This results in zero pinholes.
Iron-On Rib Tape System
Use fabric tape with powdered thermoplastic adhesive. Press onto the lining to create dowel pockets.
Critical Warning: Control your iron temperature. Too hot (Linen setting) will bubble the acrylic coating. Too cool, and the bond will fail. Always test on a scrap piece (aim for 275-320°F).
Joining Face Fabric
For side hems, use fusible hem tape. To attach the face fabric to the lining:
- Small Shades: Edge bond using pressure-sensitive drapery adhesive (Fabri-Tac) around the perimeter.
- Large Shades: Quilted bonding using fusible web sheets in a grid pattern to prevent billowing.
Construction Method 3: DIY Adhesive Approach
For those without sewing equipment. Note that hot glue is not recommended as it fails under thermal cycling (sun heat).
- Adhesive Selection: Use Beacon Fabri-Tac or Gorilla Fabric Glue.
- Prep: Lightly sand the coated lining surface with 220-grit sandpaper to help the glue grip the smooth acrylic.
- Mini-Blind Conversion: You can repurpose aluminum mini-blind slats as the structure, gluing fabric to them. However, be aware that aluminum heats up significantly in the sun, which can degrade adhesives over time.
Safety Engineering: ANSI/WCMA Compliance
Since 2024, safety standards have changed to prevent strangulation hazards.
Shroud Tape
Modern shades must use shroud tape (ladder tape). This vertical tape encapsulates the lift cord. If a child pulls the cord, the tape moves with it, preventing the formation of a hazardous loop. The attachment points must be no more than 8 inches apart.
Cordless Systems
The ultimate safety solution. You must calculate the total weight of your blackout shade (fabric + lining + hardware) to order the correct spring-loaded mechanism. Blackout shades are heavy; usually, you need a medium-duty system for a standard window.
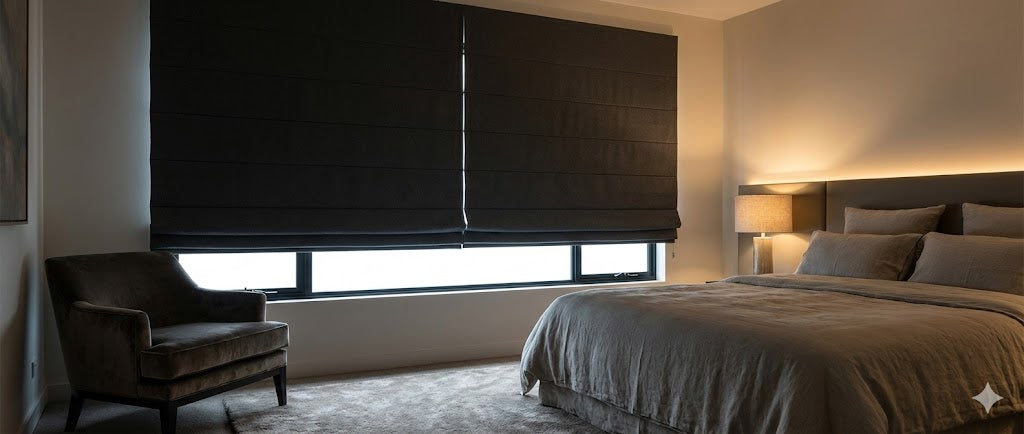
Light Gap Blocking: Architectural Integration
Even a perfect shade can leak light around the edges.
- Side Channels (Inside Mount): Install L-shaped aluminum or PVC channels on the window frame to block side gaps. Paint them to match the trim.
- Top Bleed: Install a valance board above the headrail or use a "waterfall" mount to cover the top gap.
- Bottom Seal: Use a weighted bottom bar (steel rod) and apply closed-cell foam weatherstripping to the bottom edge to seal against uneven sills.
Troubleshooting and Maintenance
- Sagging Center: Caused by weak dowels. Upgrade from wood to 1/4-inch fiberglass rods for shades over 40 inches wide.
- Uneven Lifting: Usually a friction imbalance. Check that all lift cords are tied at exactly the same length.
- Fold Training: New blackout fabric is stiff. Manually fold the shade, tie it in the raised position, and leave for 48-72 hours in a warm room to "set" the memory.
- Cleaning: Never machine wash blackout lining. The agitation destroys the coating. Vacuum with a soft brush or use professional ultrasonic cleaning.
Leave a comment
This site is protected by hCaptcha and the hCaptcha Privacy Policy and Terms of Service apply.